WHMCS User Guide
After enabling protection, you can use the plugin in the same way as users of the main Blackwall platform. All data is automatically synchronized with your Blackwall account. Apart from the appearance of the plugin's user interface, the functionality is largely identical to your Blackwall account.
Purchase and set up Blackwall plugin
Below is a guide for purchasing and setting up the Blackwall product through WHMCS:
-
Log in to the WHMCS client area.
- From the top navbar, click the Accounts dropdown.
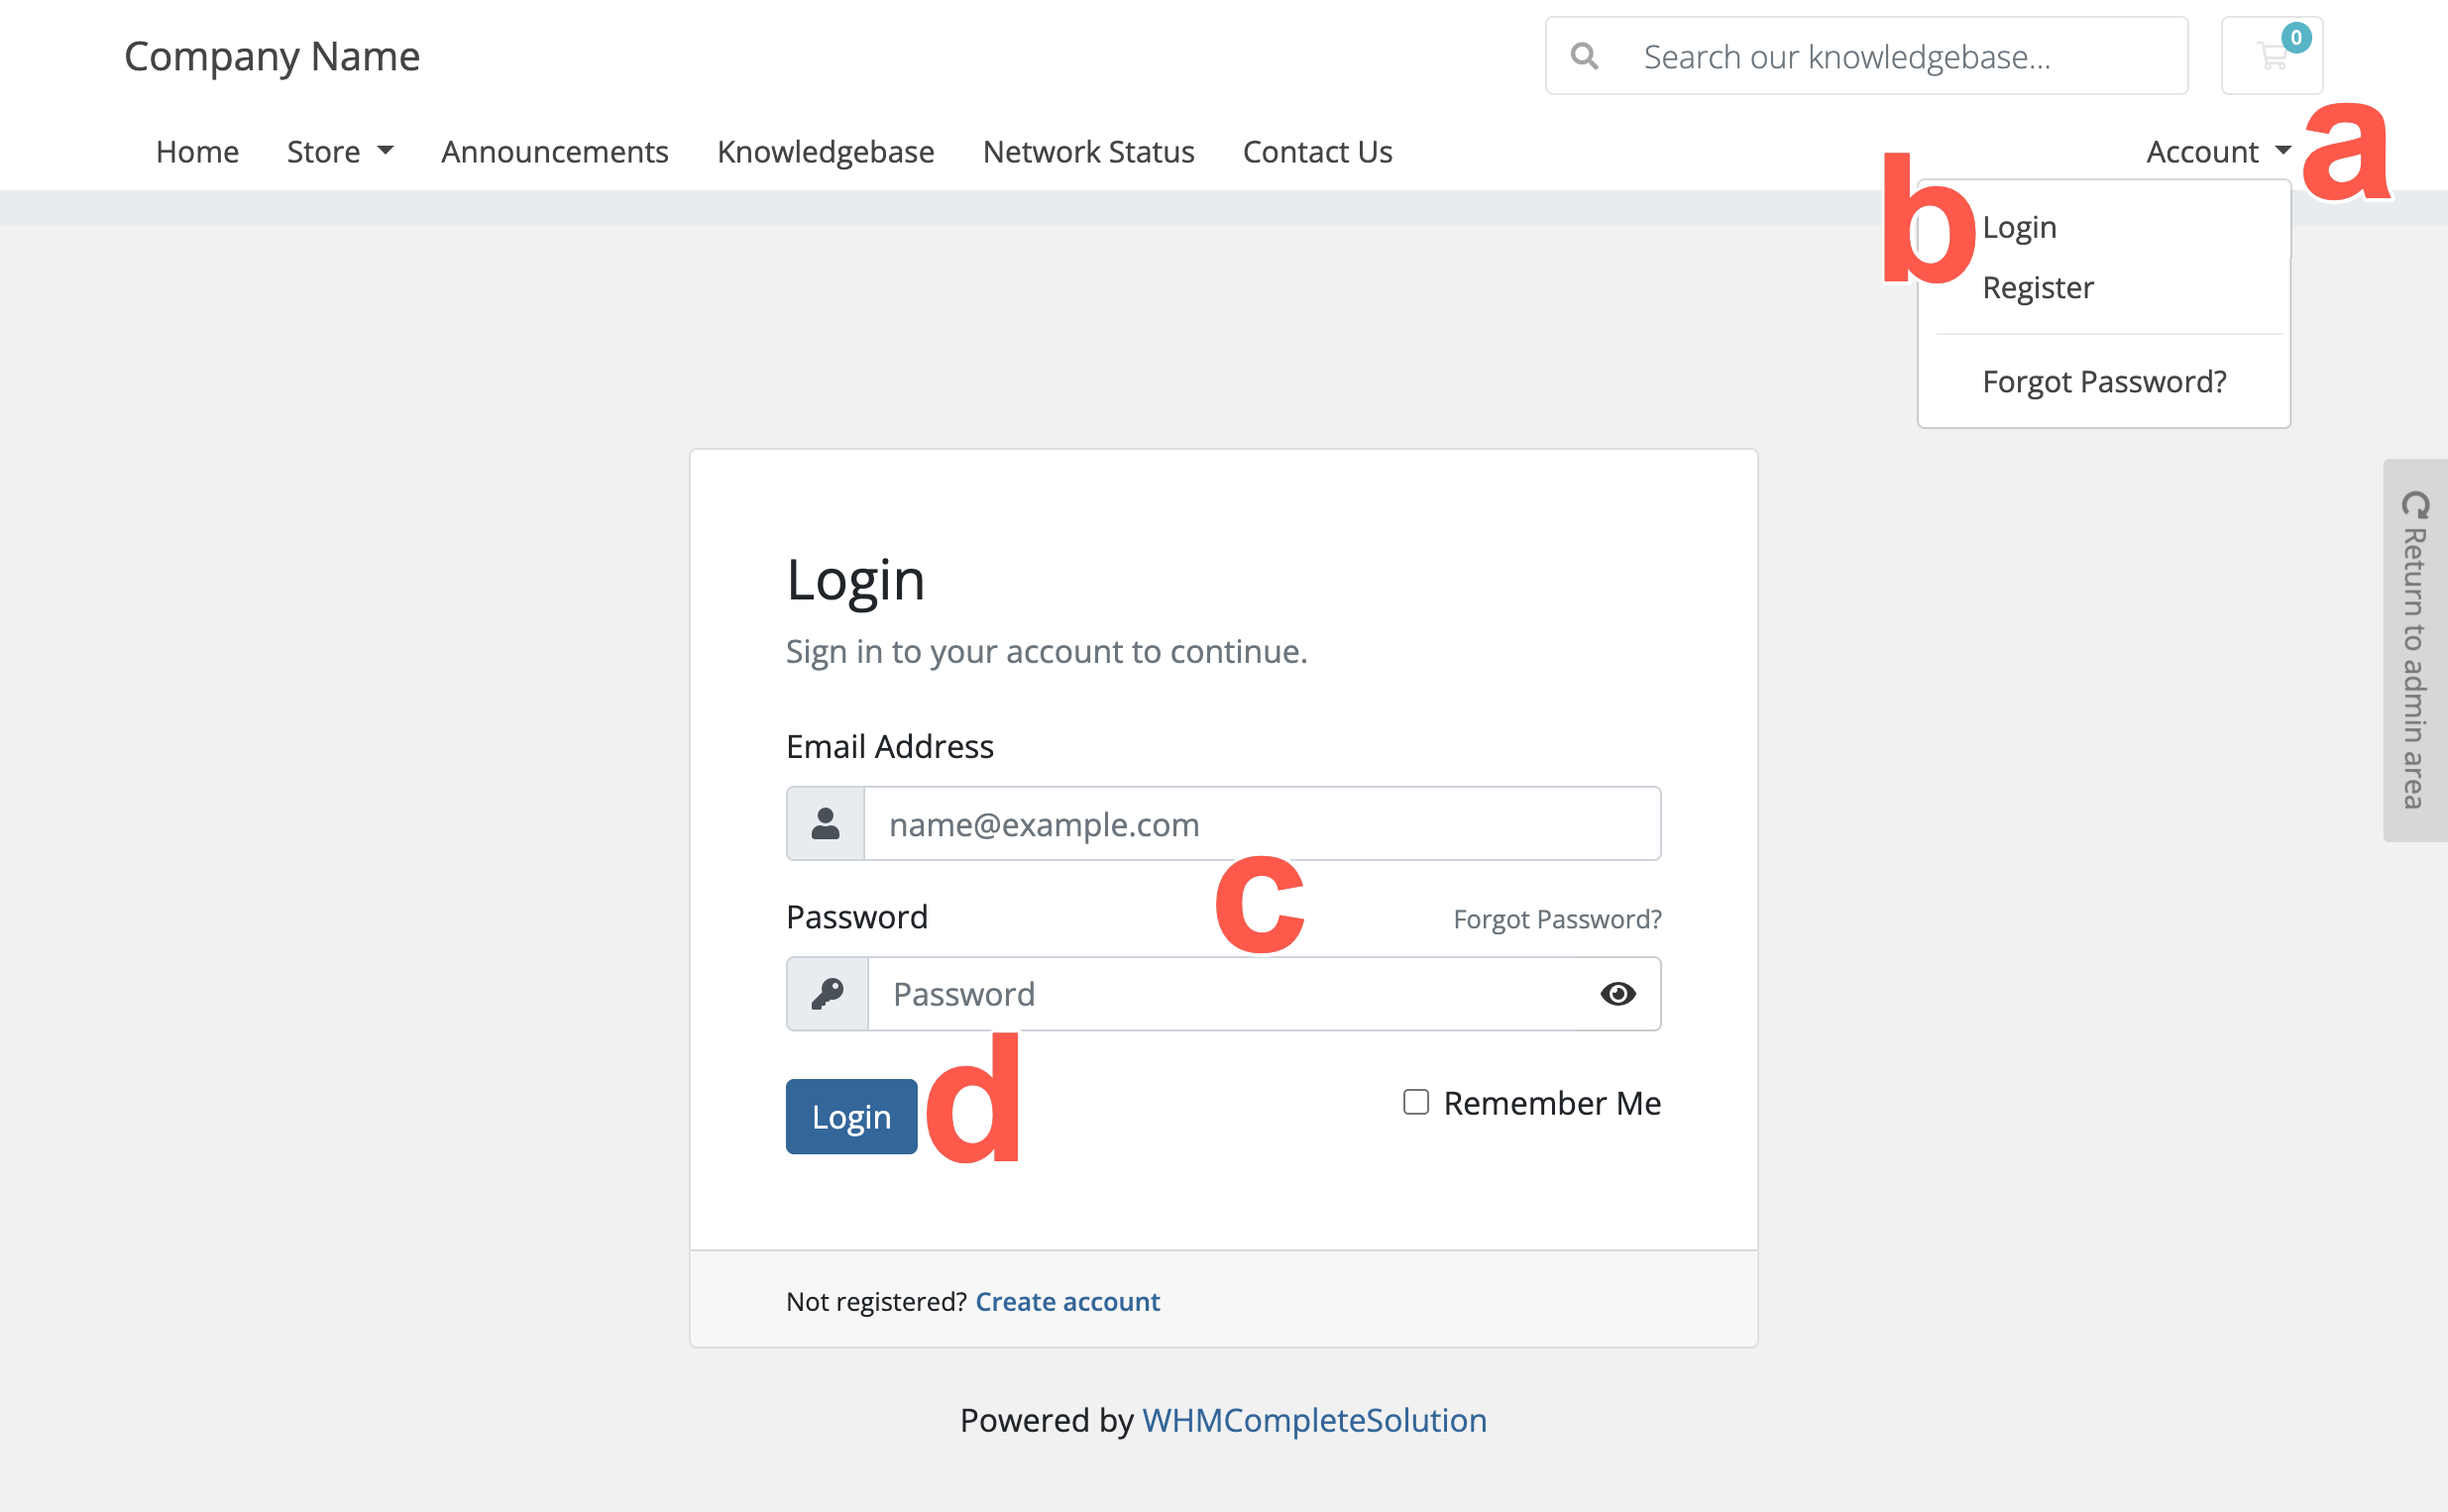 .
. - From the dropdown menu displayed, select Login.
- Type your username (your email address) and password.
- Click Login.
- From the top navbar, click the Accounts dropdown.
-
From the navbar menu, click Store.
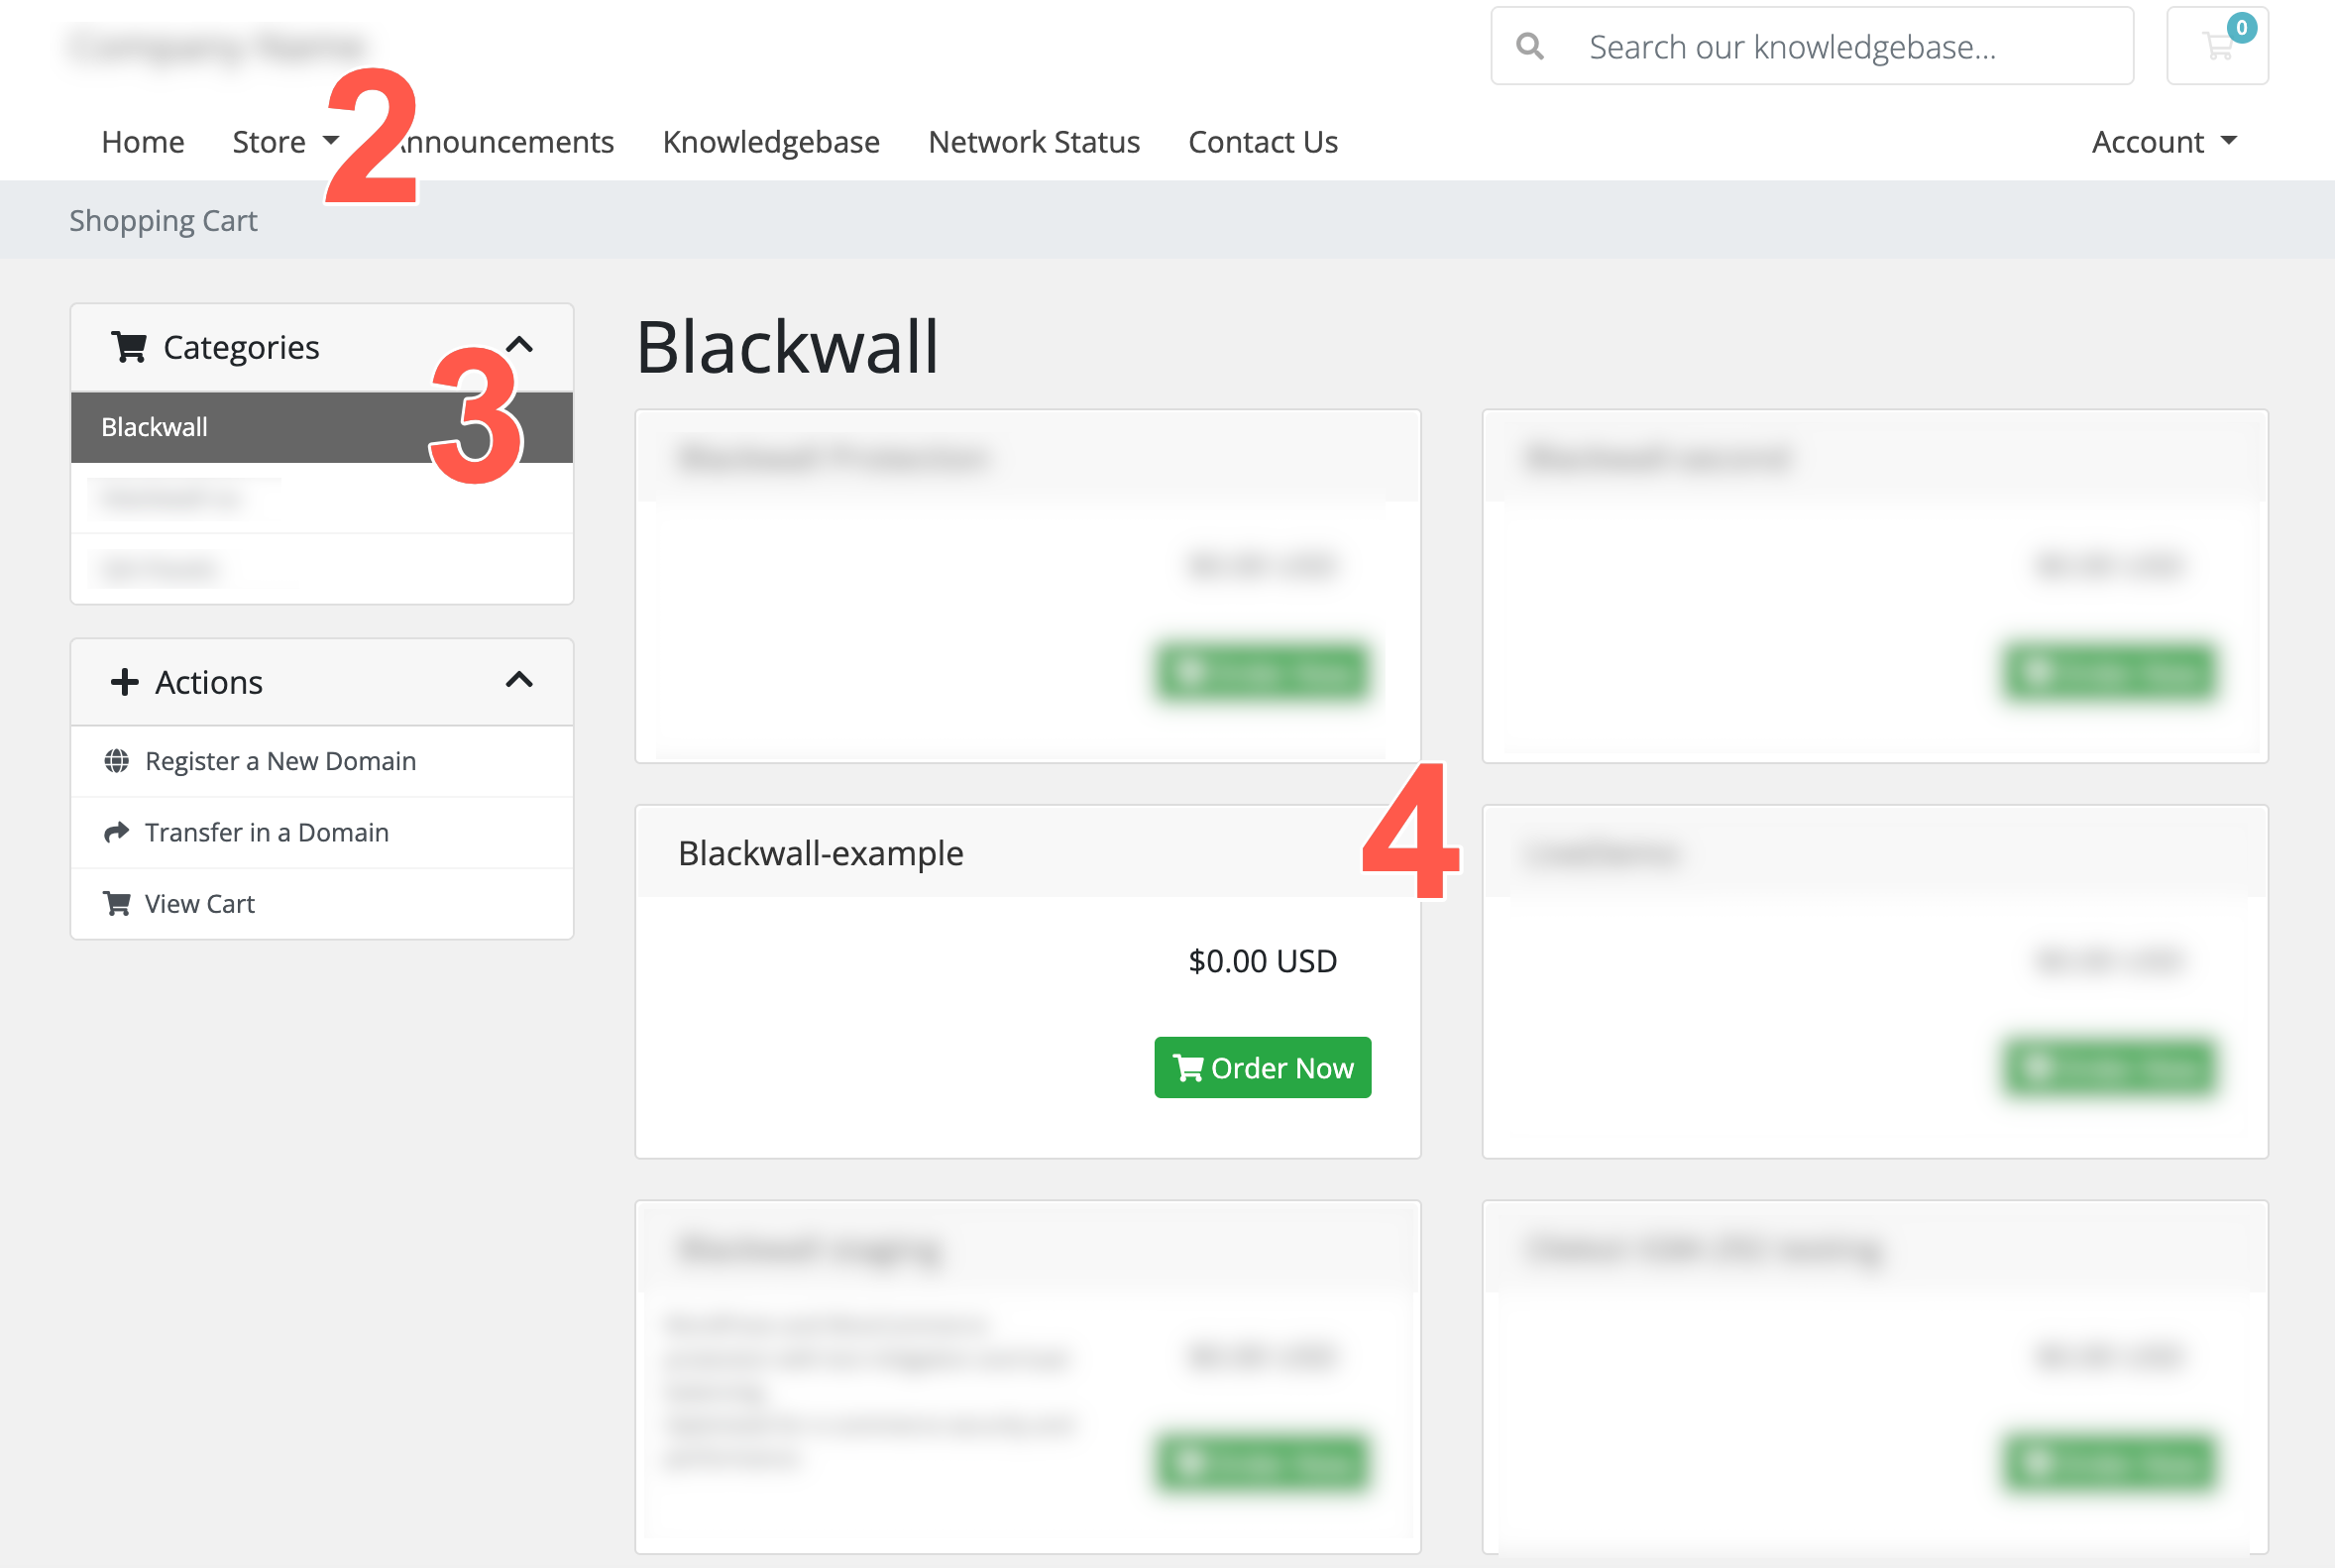 .
. -
Select the category that contains the Blackwall product.
For example: Blackwall.
-
From the widgets displayed, click the Blackwall product that you want to purchase.
-
On the Choose a Domain page that displays, choose the domain that you want to protect, by selecting one of the available domain options:
- Register a new domain: Select this option if you want to register a new domain as part of the order.
- Transfer your domain from another registrar: Select this option if you want to move an existing domain into this WHMCS account.
- I will use my existing domain and update my nameservers: Select this option if you already own the domain and only want to use it with Blackwall protection.
-
Choose the domain that you want to protect, by selecting one of the following three options.
Use this option if you want to register a new domain as part of the Blackwall order:
- Select the Register a new domain radio button.
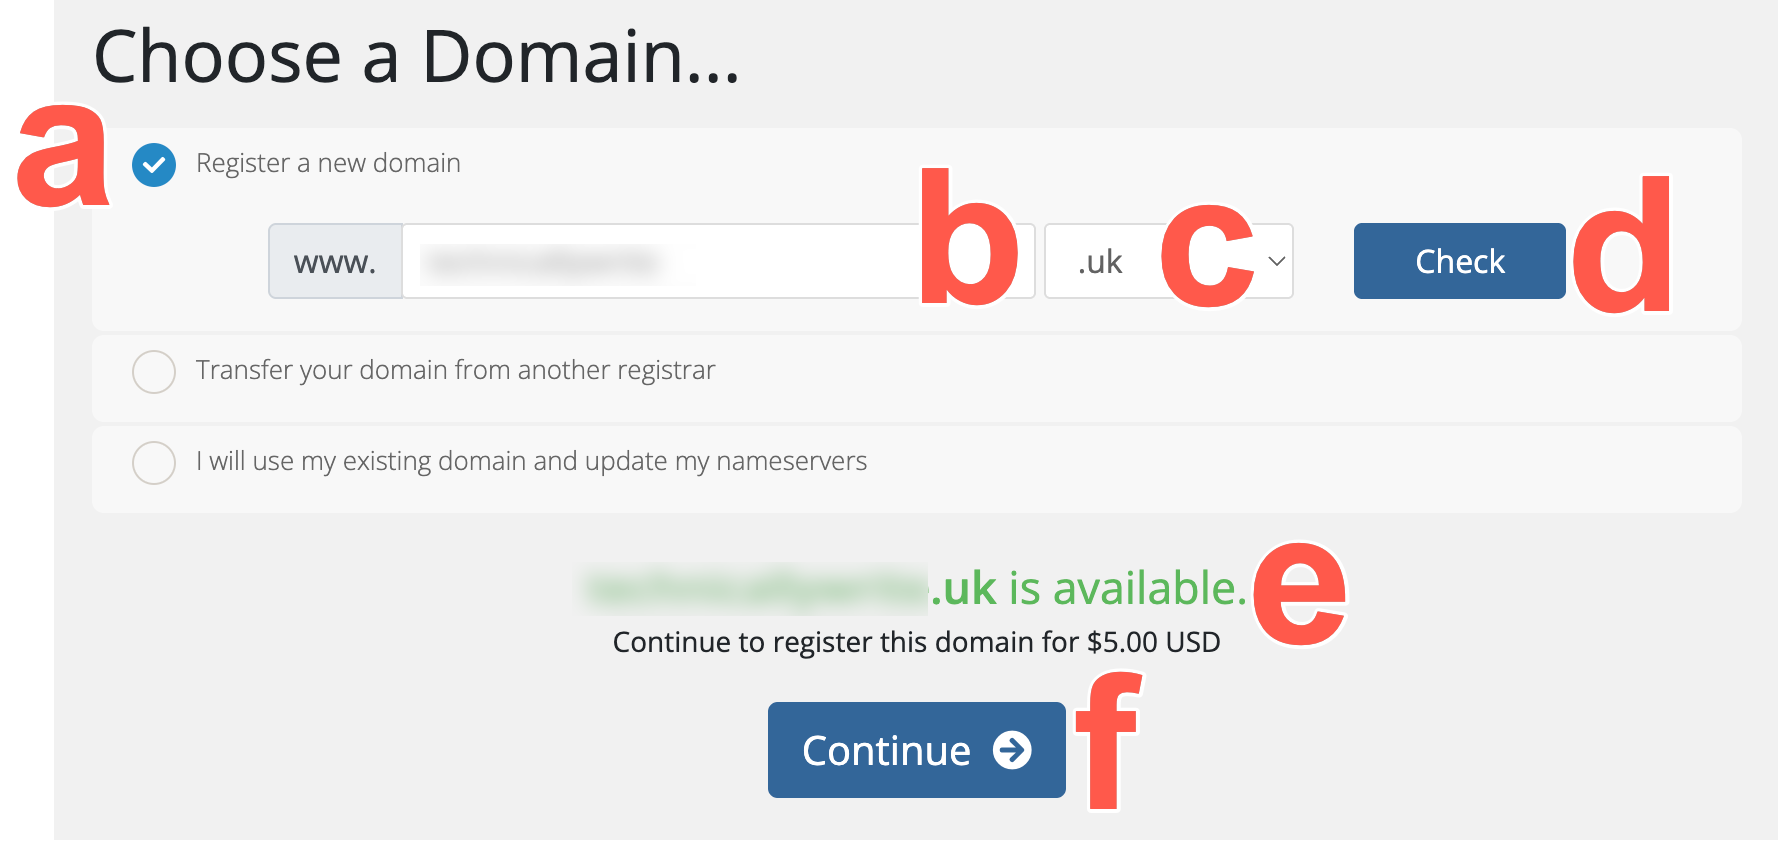 .
. - Enter the domain name that you want to register.
-
Select the required domain extension from the dropdown menu.
For example:
.uk -
Click Check.
- Check that the domain is available.
- If available, click Continue, but if the domain is not available, repeat these steps again for a different domain.
Use this option if you want to transfer an existing domain from another registrar into this WHMCS account.
- Select the Transfer your domain from another registrar radio button.
 .
. - Enter the domain name that you want to transfer.
-
Select the domain extension from the dropdown menu.
For example:
.uk -
Click Transfer.
-
Enter the transfer authorisation code if WHMCS requests it.
This may also be called an EPP code, transfer code, or authorisation code, depending on the registrar.
-
Click Continue.
Use this option if you already own the domain and only want to use it with Blackwall protection.
- Select the I will use my existing domain and update my nameservers radio button.
- Enter the domain name that you want to protect with Blackwall.
- Click Use.
- Click Continue.
- Select the Register a new domain radio button.
-
On the Review & Checkout page:
- Review the product order summary.
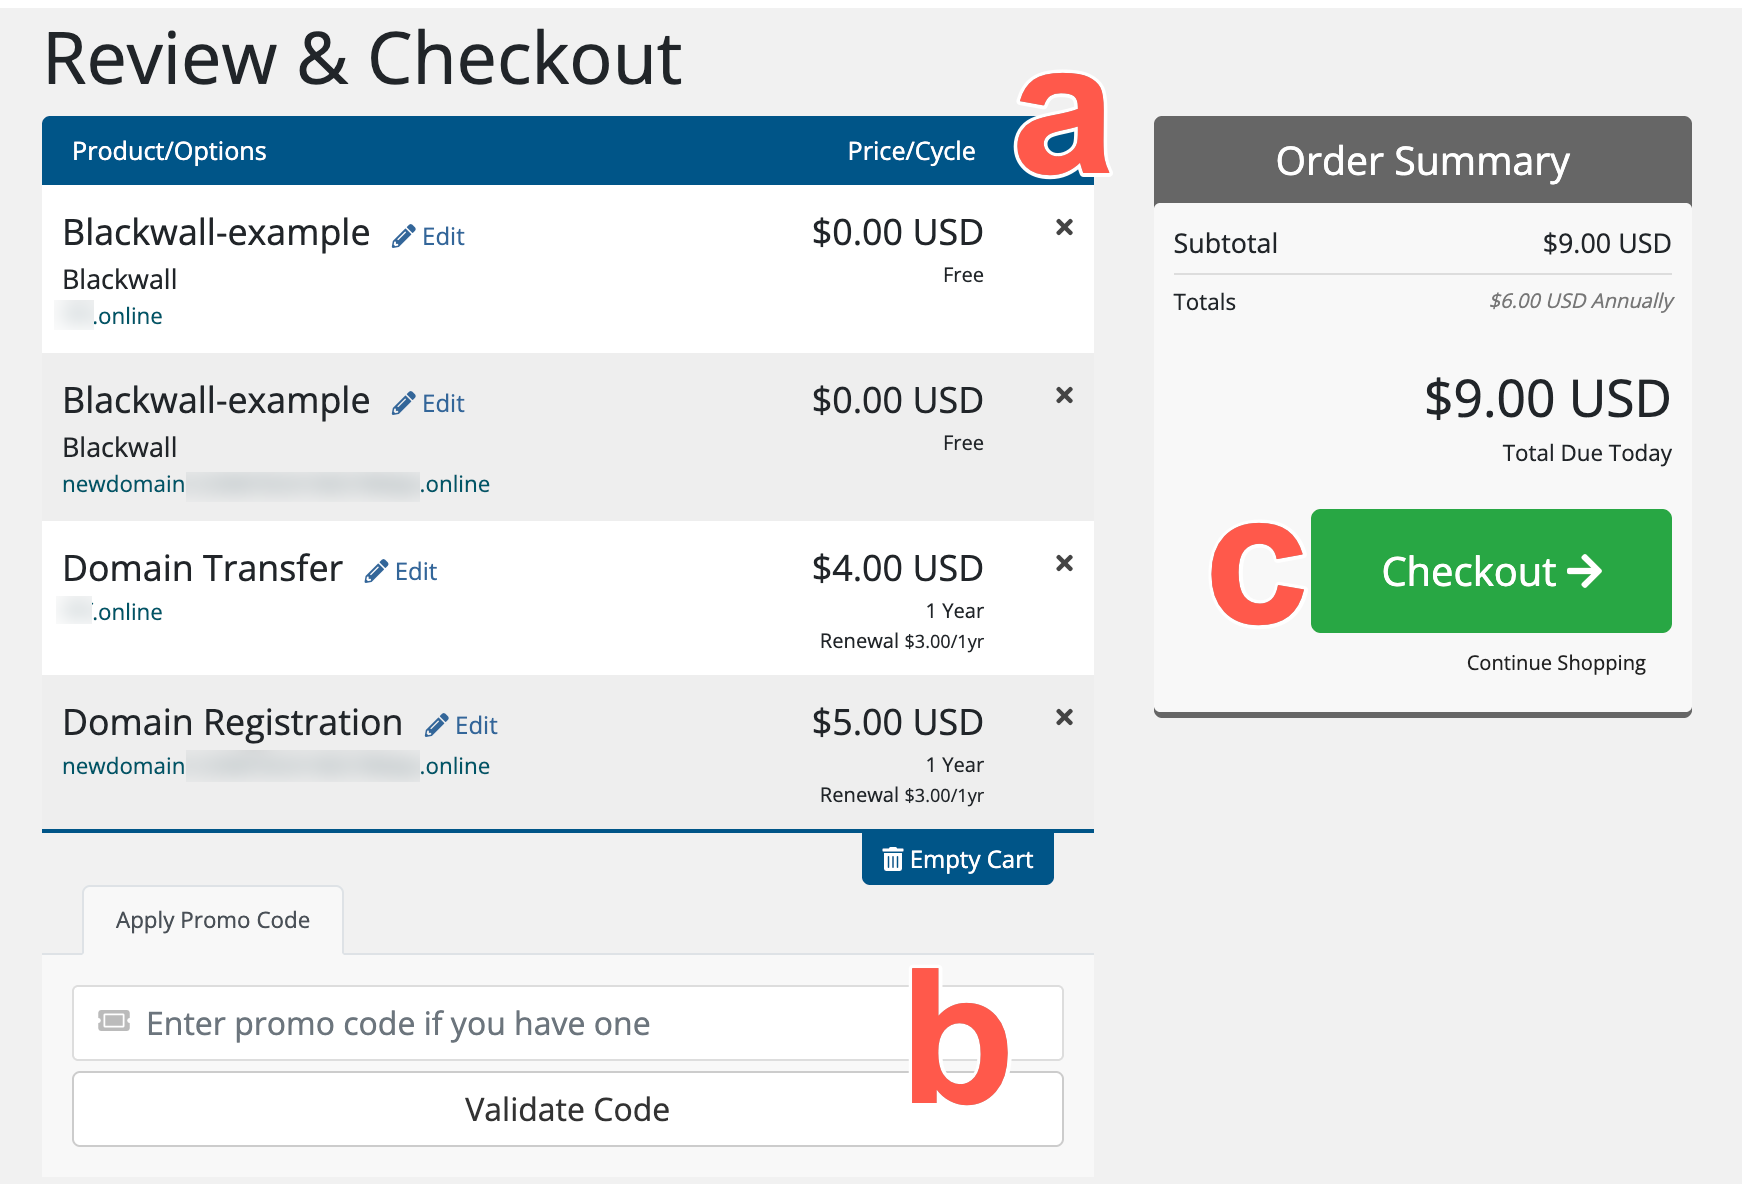 .
. - Apply a promotional code if you have one and click Validate Code.
- Click Checkout.
- Review the product order summary.
- Select your preferred payment method and enter your billing details.
- If prompted, create a strong password for your account.
- Accept the terms of service, if prompted.
- Click Complete Order.
- Complete payment using the selected payment method.
- Update the domain’s DNS or nameserver settings:
- After the order is complete, update the domain’s DNS or nameserver settings as instructed by your service provider.
- Wait for the DNS changes to propagate.
- Return to the WHMCS client area and confirm that the Blackwall product is active.
Using the Blackwall plugin
- Log into your WHMCS account.
- From the top navbar, click the Accounts dropdown.
.
- From the dropdown menu displayed, select Login.
- Type your username (your email address) and password.
- Click Login.
- From the top navbar, click the Accounts dropdown.
- Scroll the list of services displayed until you find the one that you are looking for.
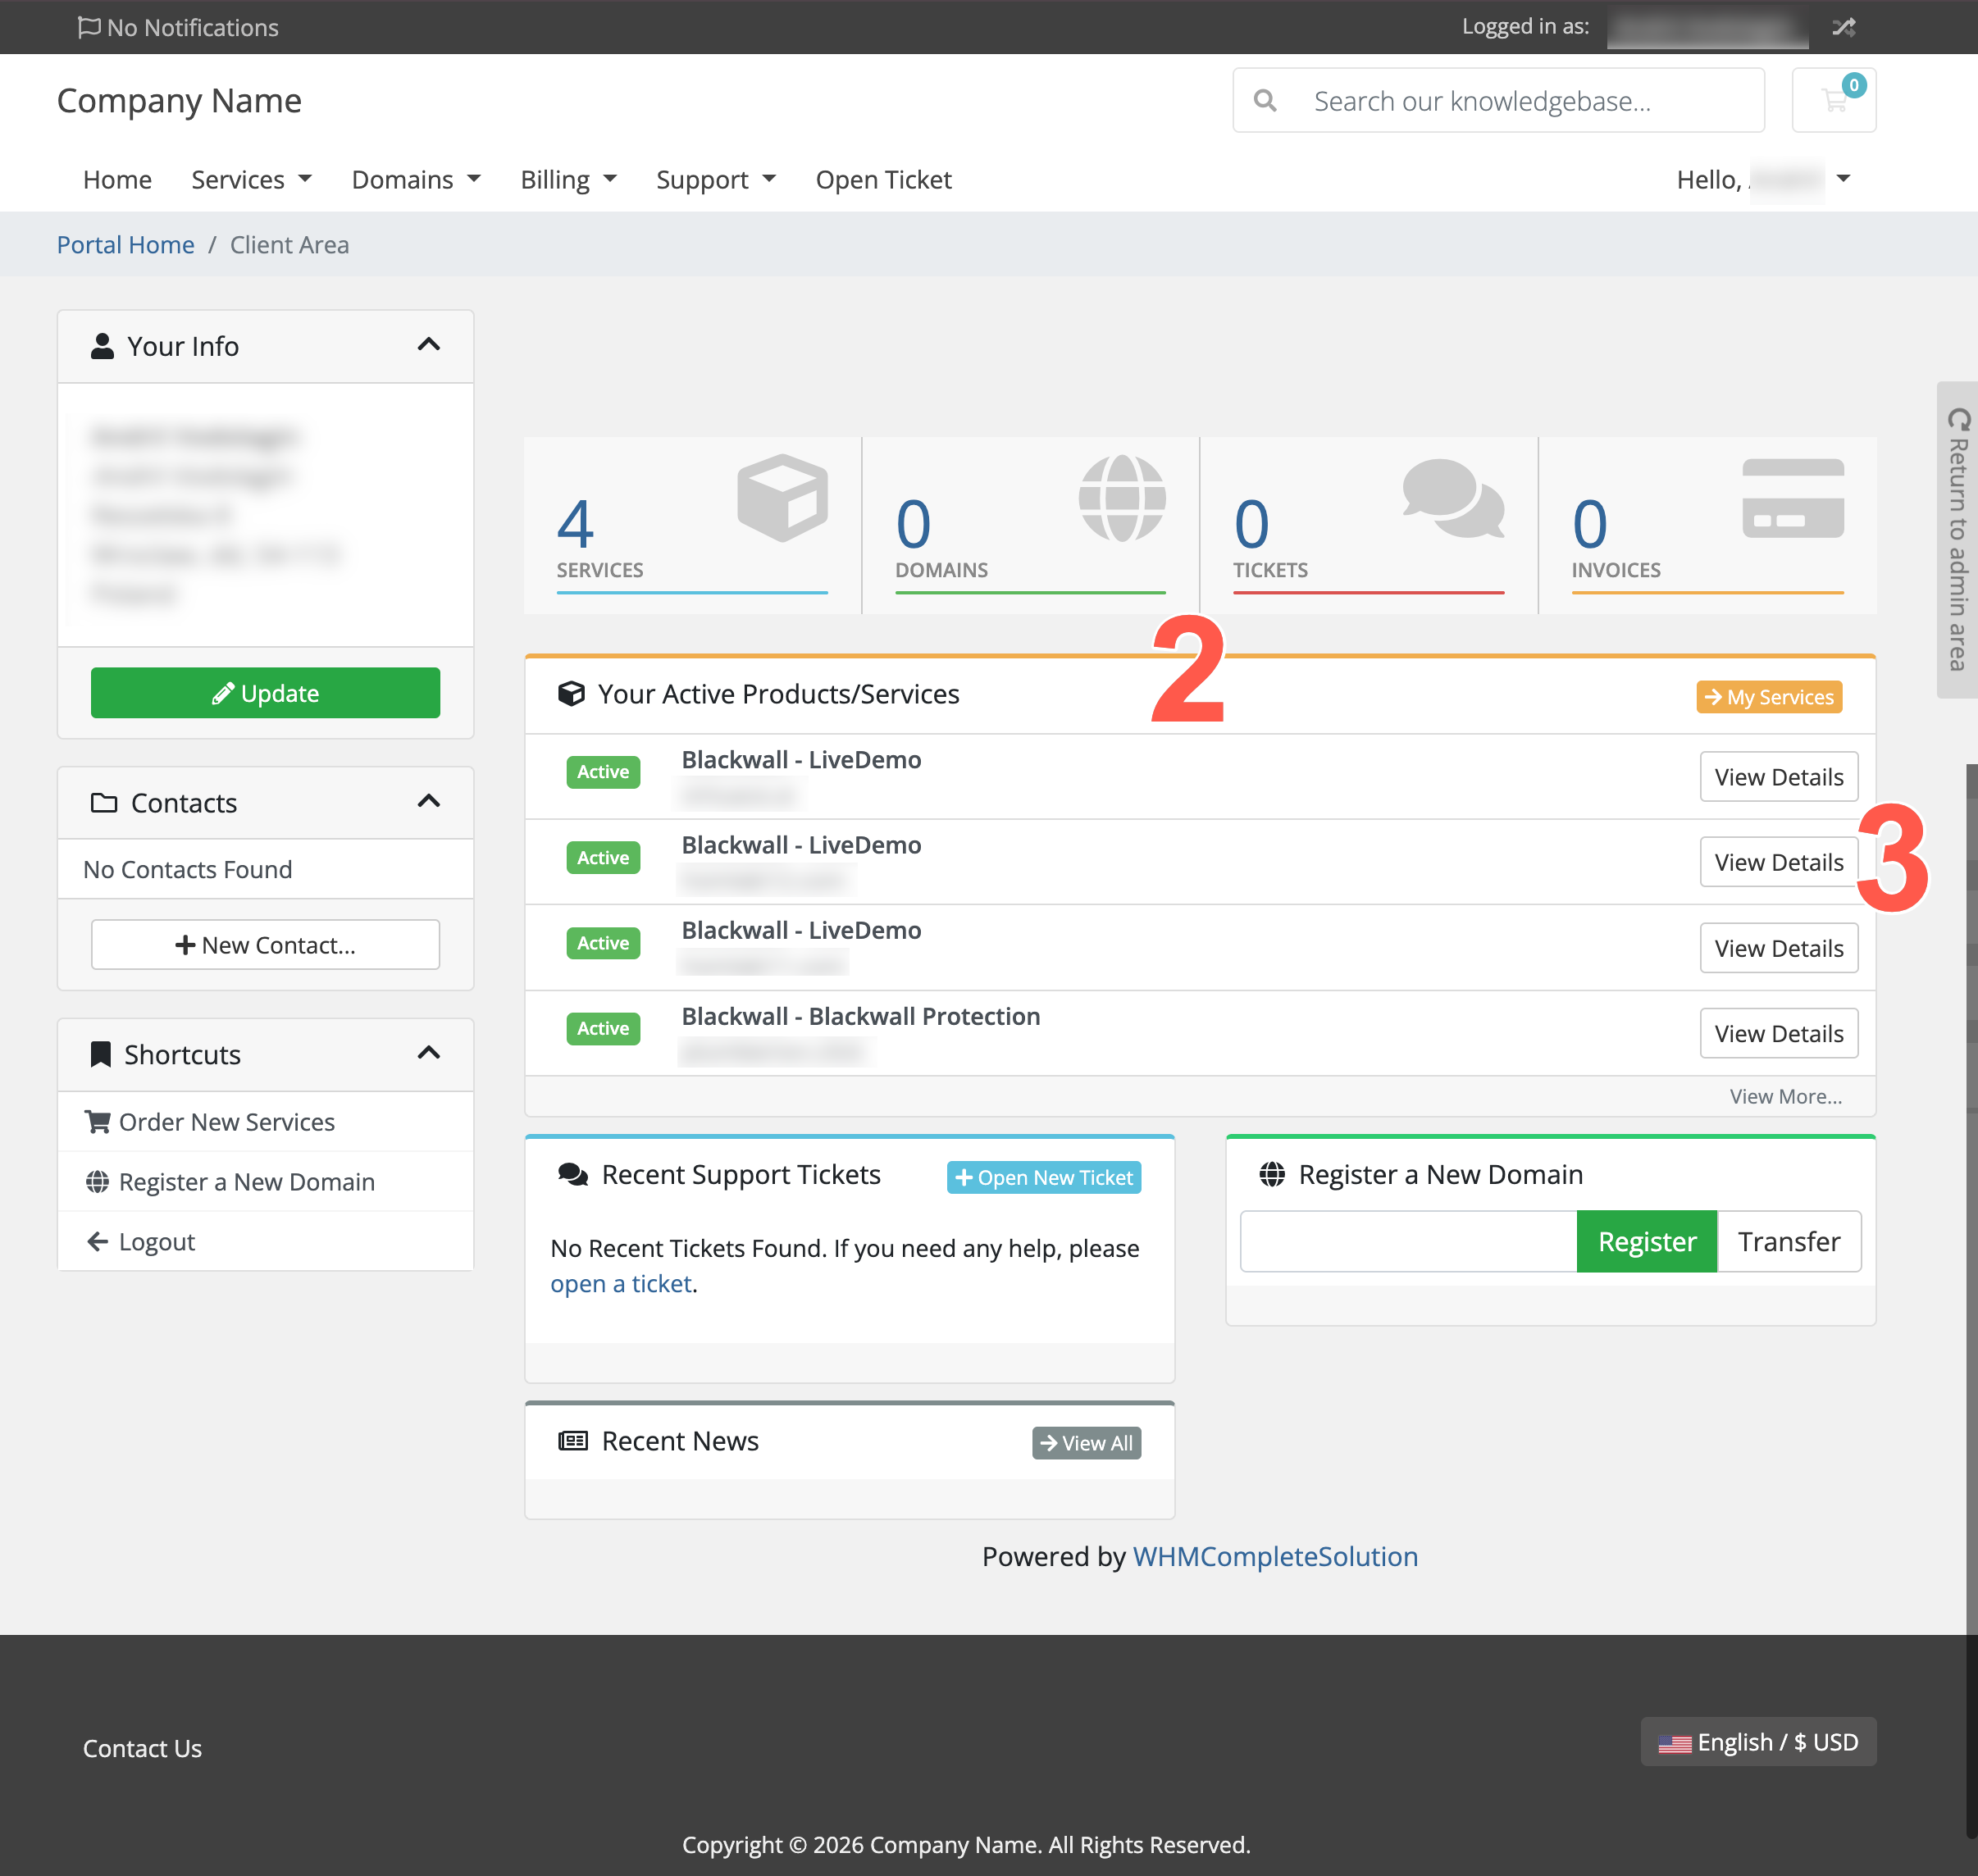 .
. - Click the View Details button that corresponds with your desired domain listing.
-
When the Product Details page displays for your selected product, you have various options available.
- This panel displays the Blackwall service status for the product. In this example, the status is ACTIVE.
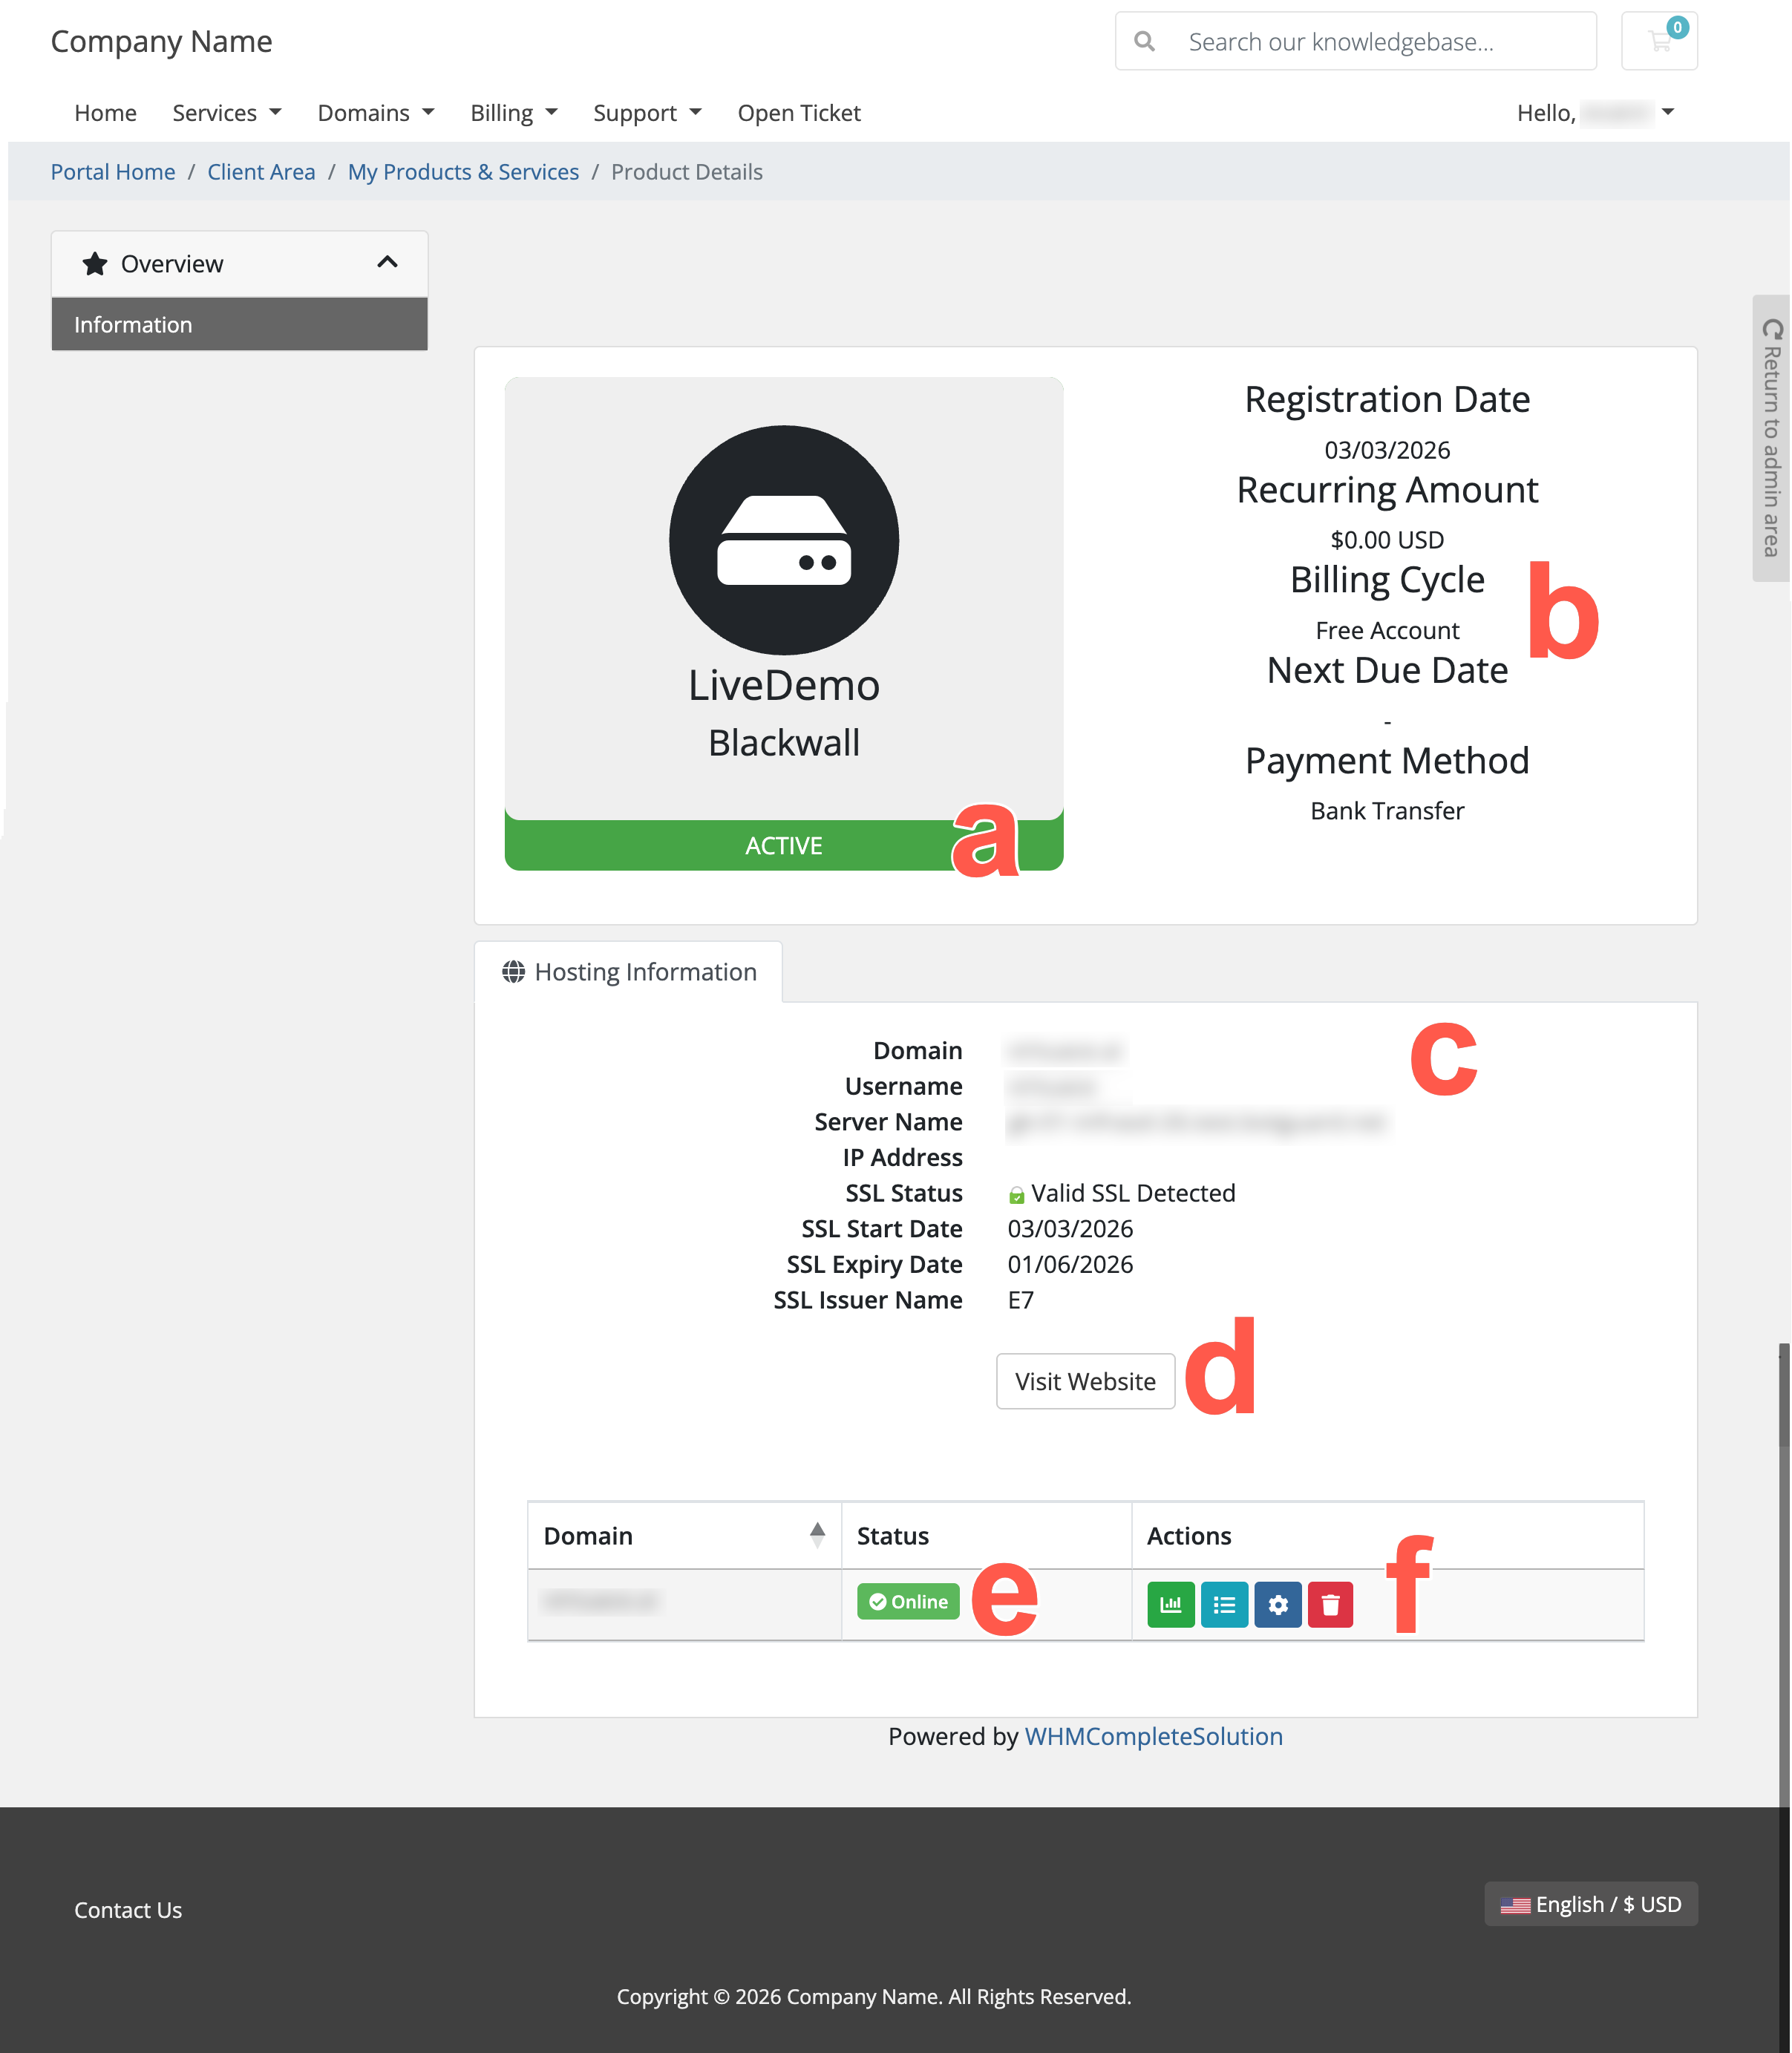 .
. - This panel is managed by WHMCS. It displays billing information associated with the service, including:
- Registration Date – The date that the service was created.
- Recurring Amount – The billing cost for the service.
- Billing Cycle – The billing plan associated with the service; e.g. Free Account, Monthly, Yearly.
- Next Due Date – The next billing date (if applicable).
- Payment Method – The payment method used for the service.
- The Hosting Information panel displays technical details, core infrastructure, and SSL details for the protected website, including:
- Domain – The domain protected by Blackwall.
- Username – The WHMCS service username.
- Server Name – The server handling the service.
- IP Address – The associated server IP address.
- SSL Status – This indicates whether a valid SSL certificate is detected.
- SSL Start Date - The date when the SSL/TLS certificate for the domain became valid.
- SSL Expiry Date - The date when the SSL/TLS certificate for the domain expires.
- SSL Issuer Name - This names the Certificate Authority (CA) that issued the SSL/TLS certificate.
- The Visit Website button provides a direct link to the protected website, opening in a new browser tab to enable users to quickly access their site, without exiting WHMCS.
- This displays the current operational status of the domain protected by Blackwall. In this example, the domain status is Online, which means that the domain is currently active and reachable.
-
The bottom panel provides management controls for the domain’s Blackwall service. These action buttons enable users to manage and monitor their Blackwall protection via the WHMCS client interface:
Although the following linked documentation is not exactly the same as the user experience in the WHMCS user interface, it covers each of the same components and functionality.
- Statistics - Viewing traffic or protection statistics. Refer to Statistics documentation.
- Events - In the context of the Blackwall platform, Events are actions, activities, or occurrences that the platform tracks and analyzes to determine whether traffic is generated by a human or a bot. Refer to Events documentation.
- Settings - Access service settings and domain configuration details, including configuration for Rules, Rulesets, and Custom Rules. Refer to the following documentation, which contains guides for the configuration options available:
- Delete - Remove Blackwall protection from your selected product.
- This panel displays the Blackwall service status for the product. In this example, the status is ACTIVE.